
beginner skiingfirst ski tripski checklistlearn to skiski holiday planningski packing listski gear guideski lessonsski resort etiquetteski holiday budget
First-Time Ski Holiday Checklist: What to Book, Pack & Know Before You Go
The Mountain Marker Team20 min read
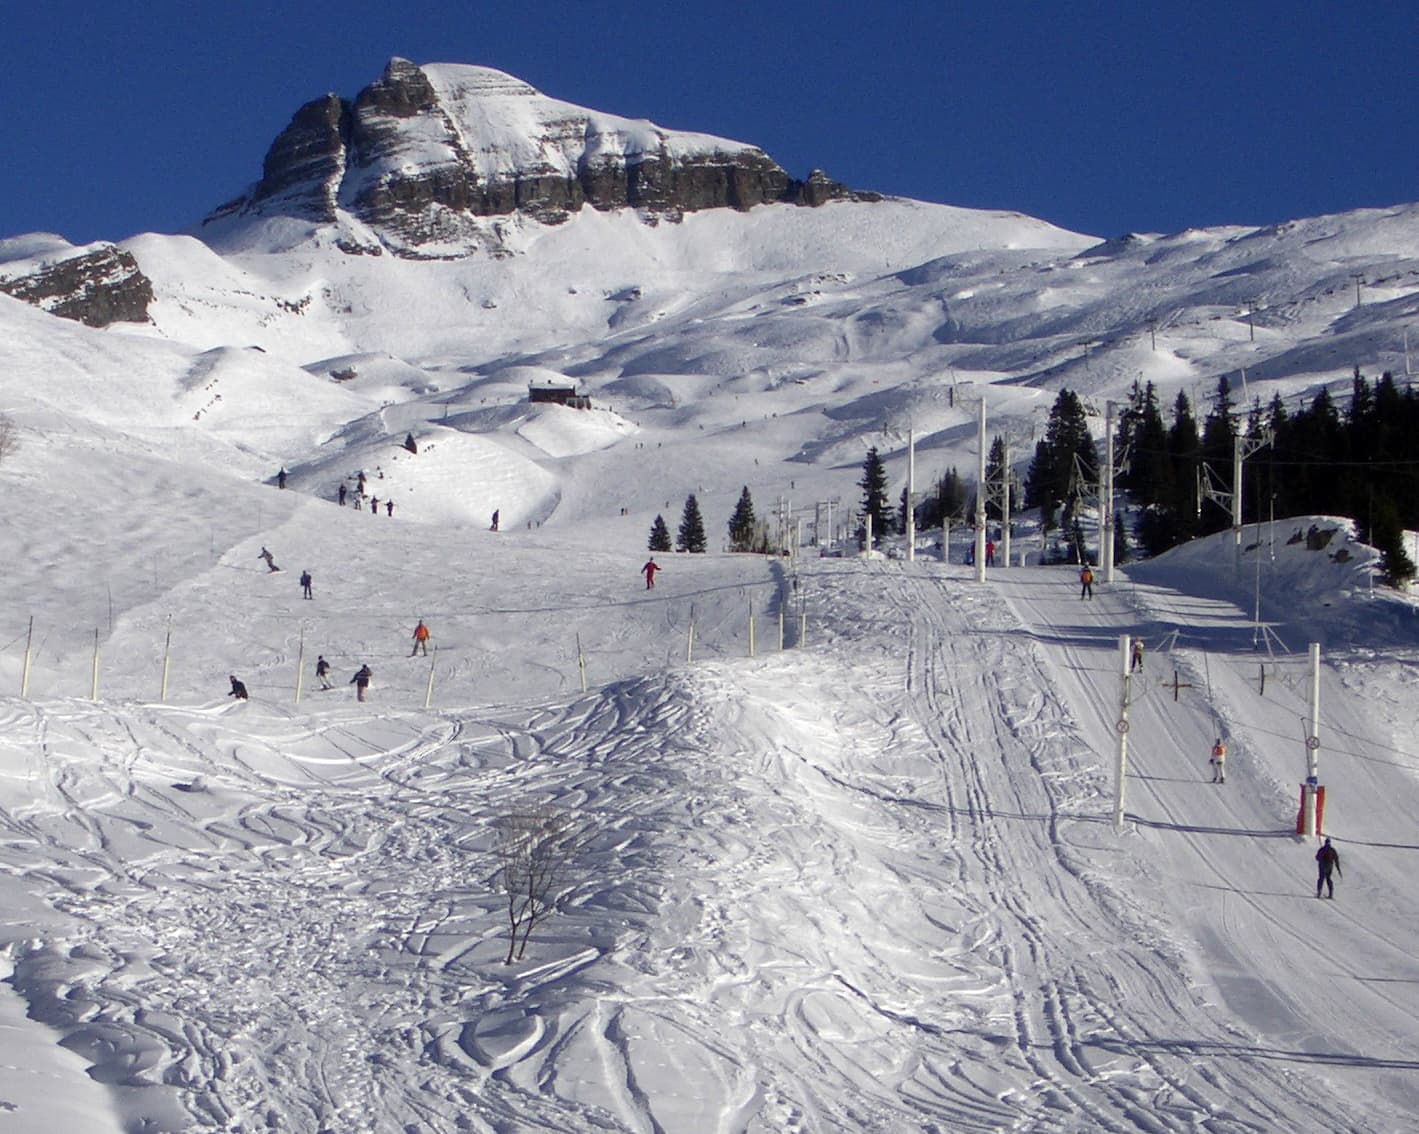
Wide groomed pistes — the kind of terrain that builds confidence
First ski trips are simultaneously exciting and overwhelming. There are things to book, gear to organize, skills to learn, and a mountain culture with its own unwritten rules to decode. Most people figure it out eventually — but doing it right from the start means your first week is enjoyable rather than a sequence of expensive, avoidable mistakes.
This checklist covers everything — from a realistic budget breakdown to piste etiquette the locals assume you already know. Work through it in order and you'll arrive at the mountain prepared.
What to Book in Advance: A Timeline
Timing matters. Book things in the wrong order and you'll pay more, get worse options, or miss out entirely. Here's the ideal booking timeline working backwards from your trip.
3-6 Months Before
- Flights. International flights to European ski destinations get expensive as winter approaches. Book as early as possible, especially for peak weeks (Christmas, New Year, February half-term). Check our guide to cheapest ways to fly to ski resorts for routes and timing.
- Accommodation. The best-value lodges, chalets, and apartments in popular resorts sell out months ahead. Self-catering apartments offer the best value for families — see the accommodation section below for a full breakdown of your options.
- Resort choice. Decide where you're going before booking anything else. See our resort recommendations below, or use the resort comparison tool to narrow your options. Our guide on how to choose the right ski resort walks through the decision step by step.
6-12 Weeks Before
- Ski school. This is the most time-sensitive booking for beginners. The best instructors and most popular group lesson slots fill up fast, especially during school holiday weeks. Book English-speaking group lessons for 3-5 consecutive days (morning sessions are standard). If budget allows, private lessons accelerate your progress roughly 3x.
- Equipment rental. Pre-booking online with the resort ski hire shop or a third-party provider (Ski-Set, Intersport, Sport 2000) is cheaper than walk-in rates and guarantees your size is available. Reserve skis, boots, poles, and helmet as a package. Our guide to hiring ski gear in Europe covers the process in detail.
- Travel insurance. Buy a policy that explicitly covers winter sports. Many standard travel policies exclude skiing — check the fine print. You need coverage for mountain rescue, medical evacuation, and equipment loss/damage.
2-4 Weeks Before
- Lift pass. Many resorts offer early-bird online discounts on lift passes. First-timers: check whether your resort has a discounted beginner/learner pass covering only the nursery slopes — these save significant money in the first few days.
- Airport transfers. Book shared or private transfers from the airport to your resort. Prices increase closer to travel dates.
- Clothing check. Try on all your ski clothing. Make sure base layers, jacket, and trousers fit with room for layering. Buy anything missing now — don't leave it until the last week.
1 Week Before
- Download offline resort maps and trail maps to your phone. Cell signal on mountains is unreliable.
- Check weather forecast for your destination. This helps you decide which glove liners, goggles, and layers to prioritize.
- Print or save all booking confirmations: accommodation, ski school, rental, insurance, transfers.
- Charge portable battery pack for your phone. Cold drains batteries fast.
Day Before Travel
- Check resort snow report and webcams. Conditions may influence which slopes are open.
- Confirm transfer pickup time and location.
- Pack documents (passport, insurance, all confirmations) in your carry-on, not checked luggage.
Step 1: Choose the Right Resort
This is the most consequential decision you'll make. A resort that's too advanced, too remote, or poorly suited to first-timers will make learning harder and the holiday less enjoyable.
What to look for in a beginner resort:
- Dedicated, wide beginner areas away from through-traffic
- Affordable or free beginner lift passes (several European resorts offer this)
- Ski school with English-speaking instructors and structured beginner programs
- Good snow reliability — not too reliant on altitude for the lower runs where you'll be spending most of your time
- Village-level amenities (restaurants, warm lodges) near the beginner zone
Our Top Beginner Resort Picks
Les Arcs, France — Free beginner lifts, purpose-built learner zones at Arc 1600 and Arc 1800, and ski school packages that bundle lessons, rental, and lift access. The green runs are genuinely gentle. Best all-round pick for first-timers.
Flaine, France — Compact village where nothing is far from the slopes. The Grand Massif area has excellent easy terrain, and prices run 20-30% below prestige resorts like Meribel. Outstanding value for families.
Wengen, Switzerland — Car-free village accessible by mountain railway, with views of the Eiger and Jungfrau. Quieter and more traditional than French mega-resorts. The ski school has an exceptional reputation for quality instruction. Higher budget, but a memorable first experience.
Mayrhofen, Austria — The Ahorn cable car accesses a wide, sunny plateau with long, easy runs perfect for building confidence. Austrian ski schools are excellent value, and the lively apres-ski scene adds to the experience.
Les Saisies, France — A hidden gem in the Beaufortain with gentle, wide terrain, authentic Savoyard village character, and prices well below the big Tarentaise resorts. Ideal for families wanting a relaxed pace.
Our full guide to best ski resorts for beginners covers more options across Europe. Browse the resort directory to compare specific resorts side by side.
Where to stay in Les Arcs
Discover family-friendly accommodation near Les Arcs.
Find chalets on Vrbo →Sponsored — we earn a small commission when you book through Vrbo. It doesn't cost you more.
Step 2: Understand Your Accommodation Options
European ski accommodation works differently than what most US travelers expect. Here are the main types and what they actually mean.
Hotels (half-board or B&B). Half-board means breakfast and dinner are included — this is the most common hotel arrangement in Austrian and Swiss resorts. It simplifies your day enormously: eat breakfast at the hotel, grab lunch on the mountain, and return for dinner. Expect to pay $150-350 per person per night depending on resort and star rating.
Self-catering apartments. The best value option, especially for families or groups. You get a kitchen and buy groceries locally. In France, purpose-built resort apartments (called "residences") are the norm — functional rather than luxurious, but right on the slopes. Budget $80-200 per night for a 4-person apartment.
Catered chalets. A distinctly British invention that has spread across the Alps. A chalet host cooks breakfast and a multi-course dinner, and afternoon cake is usually included. Sociable, good value when split among a group, and you don't have to think about meals. Most common in French resorts. Budget $120-250 per person per night.
Ski-in/ski-out means the accommodation is directly on or immediately adjacent to a ski run — you can click into your skis at the door and ski to a lift. This is a genuine convenience worth paying for, especially with kids. But verify the claim: some properties advertise ski-in/ski-out when they actually require a 10-minute walk to the nearest lift.
Step 3: Book Ski Lessons Before You Arrive
This is non-negotiable. Do not show up at the resort and assume walk-in ski school spaces will be available. The best instructors and most popular beginner group sessions book out weeks in advance, especially during peak season (Christmas to New Year, Presidents' Week in February, school half-term weeks in February).
Group vs. Private Lessons
Group lessons are the standard choice for adult beginners. You'll be placed with 6-12 other skiers at a similar level and work through structured progressions over 3-5 days (usually 2-3 hours each morning). This is socially enjoyable and cost-effective.
Private lessons cost significantly more but you'll progress roughly 3x faster. A private instructor adapts entirely to your pace, corrects your specific habits, and can take you to quieter slopes away from the crowds. If budget allows, even one or two private sessions at the start of your trip can accelerate the group lesson experience enormously.
What Lessons Cost by Country
| Country | Group (per day) | Private (per hour) |
|---|---|---|
| France | $45-70 | $60-90 |
| Austria | $40-60 | $55-80 |
| Switzerland | $65-100 | $90-140 |
| Italy | $35-55 | $50-75 |
Prices are per person for group lessons and per instructor for private. Peak-week surcharges of 10-20% are common.
What to Ask When Booking
- Are instructors English-speaking? (Most European ski schools have English-speaking instructors, but confirm availability for your dates.)
- What's the lesson-to-instructor ratio in group sessions? (8:1 is acceptable, 12:1 is too many.)
- Do lessons include or exclude lift pass for the beginner area?
- What happens if conditions are too poor to ski? (Most schools have a cancellation or rescheduling policy.)
What to Expect From Your First Lesson
Day one covers the absolute basics: how to put on and take off your skis, how to walk and sidestep, how to snowplow (the V-shaped braking position), and how to use a drag lift. You will fall. Everyone falls. The key skill nobody mentions is learning how to fall safely — sit back and to the side rather than catching yourself with outstretched arms, which risks wrist injuries.
By day 3, most beginners are linking turns on gentle blue runs and starting to feel the first real moments of flow. By day 5, you should be comfortable on all blue runs in the beginner area and possibly attempting your first easy red runs.
Step 4: Decide What Gear to Rent vs. Bring
Always rent skis and poles on your first trip. Ski technology changes rapidly and rental shops provide appropriate equipment for your level. Beginners benefit from shorter, more forgiving skis that rental shops are set up to provide correctly.
Strongly consider renting a helmet if you don't own one. Most rental shops include helmets in their packages.
Always bring or buy your own ski boots if you're doing multiple trips — rental boots rarely fit as well as personal boots, and ill-fitting boots are the most common cause of discomfort and injury for beginners. For a first trip, rental boots are fine; if you decide skiing is for you, buying boots (fitted by a professional boot fitter) is the single best upgrade you can make.
Book rental gear in advance. Resort rental shops get busy. Pre-booking online with the resort ski hire or a third-party rental company (Ski-Set, SkiLine, Sport 2000) saves time and is often cheaper. Our guide to hiring ski gear in Europe explains the process, compares rental chains, and includes tips on getting properly fitted.
A note on European rental equipment: Rental shops in the Alps are generally excellent — often better stocked and better maintained than their US counterparts. Staff will adjust DIN settings (the binding release tension) based on your height, weight, and ability. Tell them honestly that you're a beginner. Setting bindings too tight is dangerous; setting them correctly for your level means they release before your knees don't.
Step 5: Buy a Lift Pass — But Don't Overbuy
First-time skiers do not need a full-mountain pass. Many European resorts offer:
- Beginner/learner passes covering only the nursery slope lifts, often at significantly reduced cost or free
- Points cards that you load credit onto and use per lift — better value if you're unsure how much you'll actually ski
Ask the ski school what lift access is included in your lessons. Sometimes the lesson fee covers beginner lift access and you don't need a separate pass at all for the first couple of days.
By day 3 or 4, if you're progressing, you may want to upgrade to a broader area pass. Most resorts allow top-ups from beginner passes.
How Much Does a First Ski Holiday Actually Cost?
One of the biggest questions first-timers have — and one that's rarely answered honestly. Here's a realistic per-person budget for a 7-night ski holiday in Europe, flying from the US East Coast, based on a mid-range trip in January or February.
| Expense | Budget | Mid-Range | Premium |
|---|---|---|---|
| Return flights (US to Europe) | $450-600 | $600-900 | $900-1,500 |
| Accommodation (7 nights) | $500-700 | $700-1,200 | $1,200-2,500 |
| Lift pass (6 days) | $200-280 | $280-380 | $350-500 |
| Equipment rental (6 days) | $100-150 | $150-220 | $220-350 |
| Ski lessons (5 days group) | $200-300 | $300-400 | $400-600 |
| Airport transfers (return) | $80-120 | $120-180 | $180-350 |
| Food & drink (7 days) | $250-400 | $400-700 | $700-1,200 |
| Travel insurance | $50-80 | $80-120 | $120-200 |
| Total per person | $1,830-2,630 | $2,630-4,100 | $4,070-7,200 |
The budget column assumes a value resort in France or Austria (like Flaine or Les Saisies), a self-catering apartment shared with others, and eating in rather than dining out. The premium column reflects a Swiss resort like Wengen, a good hotel with half-board, and private lessons.
The single biggest variable is accommodation. Sharing a self-catering apartment with friends or family can halve your per-person cost compared to a hotel. See our guide on cheapest ways to fly to ski resorts for flight savings strategies.
Gear Recommendations by Temperature Range
Not all ski days are the same. Here's how to adjust your layering based on the forecast temperature at resort altitude (not valley temperature — it's typically 9-18 degrees Fahrenheit colder on the mountain).
Mild Days: 28 to 41 degrees Fahrenheit (-2 to 5 degrees Celsius)
Common in early/late season and at lower-altitude resorts. Spring skiing in March and April often hits this range.
- Base layer: Lightweight merino or synthetic thermal top. You may skip thermal bottoms.
- Mid layer: Thin fleece or long-sleeve technical shirt. Don't over-insulate — you'll sweat.
- Outer layer: Waterproof ski jacket (ventilation zips are essential in this range). Standard ski trousers.
- Hands: Lighter ski gloves. Leave heavy mittens at the lodge.
- Head/face: Helmet only. Neck gaiter optional. Sunglasses may be more comfortable than goggles if it's sunny.
- Key risk: Overheating. Beginners work harder than experienced skiers, generating more body heat. Dress lighter than you think.

Cold Days: 14 to 28 degrees Fahrenheit (-10 to -2 degrees Celsius)
The most common mid-winter temperature range at Alpine resorts. Standard conditions at places like Les Arcs or Flaine in January and February.
- Base layer: Mid-weight merino thermal top and bottoms. This is the core of your warmth system.
- Mid layer: Fleece jacket or insulated mid-layer.
- Outer layer: Waterproof ski jacket, fully zipped. Waterproof ski trousers.
- Hands: Insulated waterproof ski gloves. Glove liners underneath for extra warmth.
- Head/face: Helmet with ear coverage. Ski goggles (essential — wind chill on chairlifts is brutal). Neck gaiter pulled up over chin.
- Feet: Proper ski socks (one pair only — doubling up restricts circulation and makes feet colder).
- Key risk: Cold extremities. Hands and feet suffer first. Wiggle your fingers and toes on chairlifts.
Very Cold Days: Below 14 degrees Fahrenheit (Below -10 degrees Celsius)
High-altitude resorts like Val d'Isere in the Espace Killy area, or exposed resorts in harsh weather. Also common at resorts above 8,200 feet (2,500m).
- Base layer: Heavyweight merino thermal top and bottoms.
- Mid layer: Thick fleece or down mid-layer. Consider a vest for core warmth under your jacket.
- Outer layer: Waterproof ski jacket (all vents closed). Insulated ski trousers if you have them, or standard waterproof trousers over thermal bottoms.
- Hands: Mittens over gloves — significantly warmer. Hand warmers (disposable heat packs) in mittens or gloves.
- Head/face: Helmet, goggles, and balaclava or full-face neck gaiter. Every square inch of exposed skin loses heat.
- Feet: Proper ski socks plus toe warmers (adhesive heat packs that stick inside the boot).
- Key risk: Frostbite on exposed skin. If any body part goes numb, go inside immediately. Beginners spend more time standing still (in lessons, waiting for lifts) than experienced skiers, so you feel the cold more.
Gear Quality Guide for First-Timers
You don't need to buy top-tier gear for your first trip, but some items are worth investing in:
| Item | Worth investing in? | Why |
|---|---|---|
| Ski jacket | Yes — buy mid-range (waterproof 15,000mm+) | You'll use it for years, even if you don't ski again |
| Ski trousers | Yes — buy mid-range | Same as above. Cheap trousers leak when you sit in snow |
| Base layers | Yes — buy merino wool | Cotton is useless when wet. Merino regulates temperature |
| Ski socks | Yes — buy proper ski socks | Regular socks bunch up inside boots and cause blisters |
| Helmet | Rent for first trip, buy if you return | Important safety item but only worth buying if you'll reuse |
| Goggles | Buy budget/mid-range | Even cheap goggles beat none. Get a dual-lens option |
| Gloves | Buy mid-range waterproof | Wet, cold hands ruin days faster than anything else |
| Skis & boots | Always rent for first trip | Rental shops match equipment to your ability |
The Complete Packing Checklist
Print this out or screenshot it before you travel. Items marked with an asterisk (*) can be rented at the resort if you'd rather not buy.
Ski Clothing
- Waterproof ski jacket (15,000mm+ hydrostatic head)
- Waterproof ski trousers/salopettes (same waterproofing standard)
- Thermal base layer tops x 2 (merino or synthetic — NOT cotton)
- Thermal base layer bottoms x 2
- Mid-layer fleece or insulating jacket
- Ski socks x 3 pairs (merino or synthetic, calf-length)
- Waterproof ski gloves or mittens (with wrist leashes)
- Thin glove liners (for warmer days or backup inside wet gloves)
- Neck gaiter or buff
- Ski helmet* (non-negotiable — rent if you don't own one)
- Ski goggles (ideally dual-lens: dark for sun, light/orange for overcast)
- Sunglasses (for off-slope time and mild days)
On-Mountain Essentials
- Sunscreen SPF 50+ (altitude + snow reflection = serious burn risk)
- Lip balm with SPF
- Small backpack or ski jacket with large pockets (for sunscreen, phone, snacks)
- Portable phone charger (cold drains batteries fast)
- Waterproof phone case or zip-lock bag
- Tissues/hand towel (runny nose is constant in cold air)
- Energy bars or snacks (for the chairlift or mid-morning)
- Hand warmers (disposable heat packs) x 4-6
- Toe warmers x 4-6
Apres-Ski & Village Wear
- Warm, waterproof boots for walking resort village (not ski boots)
- Comfortable evening shoes
- Casual warm clothing for evenings (jeans, jumpers, layers)
- Warm hat or beanie (for off-slope)
- Down jacket or warm coat for evening walks
Health & First Aid
- High-SPF sunscreen (50+) — take two bottles, you'll use more than you think
- Lip balm with SPF (a spare in your ski jacket pocket)
- Moisturizer — mountain air is extremely dry
- Blister kit — Compeed patches are better than standard plasters
- Ibuprofen/acetaminophen — sore muscles are inevitable on days 1-3
- Any prescription medication (travel insurance won't cover a forgotten prescription)
- Rehydration sachets (optional but helpful, especially at higher-altitude resorts)
Documents & Admin
- Passport (or national ID if traveling within Europe)
- Travel insurance documents — print a copy AND save digitally. Confirm winter sports coverage.
- Accommodation booking confirmation
- Ski school booking confirmation
- Rental gear booking confirmation
- Airport transfer booking confirmation
- Lift pass voucher/booking (if pre-purchased)
- Emergency contact numbers for resort mountain rescue
- Photocopies of passport/insurance stored separately from originals
Technology
- Portable phone charger (fully charged)
- Charging cable
- Waterproof phone case or ski phone holder
- Downloaded offline maps of the resort and surrounding area
- Downloaded trail/piste map for the resort
- Camera or GoPro (optional — phone cameras work fine)
- Headphones for flights/travel
Resort Etiquette and Piste Rules
European resorts follow the FIS (International Ski Federation) Rules of Conduct. These aren't suggestions — they're the skiing equivalent of traffic laws, and you can be fined or have your lift pass revoked for serious violations. The most important rules for beginners:
- Give right of way to the skier downhill of you. They cannot see you. It is always your responsibility to avoid them, even if they stop suddenly or do something unpredictable.
- Control your speed. You must be able to stop or change direction at any moment. Ski within your ability, especially on crowded runs and near lift stations.
- Stop at the side of the piste, not in the middle. If you need to rest, move to the edge of the run where you're visible from above. Never stop just below a blind crest or roller.
- Look uphill before merging. When entering a run from a side trail, lift station, or after stopping, look uphill to check for oncoming skiers before pulling out.
- Respect closed signs. If a piste is marked as closed (usually a red X or a rope barrier), do not enter. The closure exists for a reason — avalanche risk, grooming equipment, thin cover, or a rescue in progress.
Chairlift Etiquette
Loading a chairlift for the first time is nerve-wracking, but it's straightforward once you've done it. Shuffle forward in the queue line, watch the chair approaching from behind, sit down as it reaches you, and pull the safety bar down. Keep your ski tips pointed forward and up. At the top, raise the bar when the sign says to, stand up, and glide forward down the unloading ramp. If you fall getting off, move out of the way quickly — the next chair is 8 seconds behind you. Don't be embarrassed; the lift operators see it dozens of times a day and will slow or stop the lift if needed.
Mountain Lunch Culture
Unlike US resorts where grabbing a quick sandwich is normal, a sit-down mountain lunch is a ritual in European skiing. Many skiers take a full hour at a mountainside restaurant between noon and 1:30pm. This is actually useful for beginners — your legs need the break more than you think. Budget 15-25 euros per person for a table-service mountain lunch. Tipping is simpler than in the US: round up to the nearest euro or add 5-10% for good service.
What to Expect on the Mountain
The first two days are the hardest. Your body is learning entirely new movement patterns, you're altitude-acclimatizing, and your equipment probably doesn't fit perfectly yet. Most people fall repeatedly in the first two days. This is normal. Don't judge your progress against experienced skiers around you.
The breakthrough happens around day 3. Almost universally, beginner skiers hit a click moment around day 2.5-3 where the basics start to feel automatic. The days after that are the most enjoyable of any ski trip — you have enough control to go fast enough to be fun, but everything is still new enough to be exciting.
Apres ski: Ski resorts come alive at around 3-4pm when the lifts close. European resorts especially have a strong culture of hot drinks, live music, and socializing at mountain bars before heading back to the village for dinner. Don't skip this — it's part of what makes ski holidays different from regular vacations.
Common First-Timer Mistakes
- Booking the wrong resort. An expert-oriented mountain with limited beginner terrain makes learning miserable. Do your research — start with our guide to best ski resorts for beginners.
- Skipping ski school. Self-teaching skiing works for about 1 in 50 people. The other 49 develop bad habits that are expensive to unlearn later. Book lessons.
- Wearing cotton. Cotton base layers get wet from sweat, then stay wet and cold for the rest of the day. Merino wool or synthetic only.
- Overdressing on mild days. Beginners work hard physically. You'll overheat in too many layers. Start lighter than you think and add layers if cold.
- Not booking gear rental in advance. Walk-in rental on a Saturday morning means standing in a queue for 45 minutes and getting whatever's left. Pre-book online.
- Buying a full-mountain lift pass on day one. You won't leave the nursery slope for the first two days. Buy a beginner pass and upgrade later.
- Ignoring sunscreen. UV at altitude is brutal, and snow reflects it back at you. Apply SPF 50 every 2 hours, including under your chin (snow reflection).
- Trying to keep up with experienced friends. Ski at your own pace. Your friends can meet you for lunch.
The Bottom Line
The right preparation removes almost all of the anxiety from a first ski trip. Choose a beginner-friendly resort (Les Arcs and Flaine are our top two picks), book lessons early, rent your gear in advance, and pack the right layers for the conditions. A realistic budget is $2,600-4,100 per person for a week — significant, but comparable to any international vacation and unlike anything else you'll experience.
Browse the resort directory to start comparing beginner-friendly options, use the comparison tool if you've got two or three destinations in mind, or read our guide on how to choose the right ski resort for a structured decision framework.
 Resort
Les Arcs
France
 Resort
Flaine
France
 Resort
Wengen
Switzerland
 Resort
Mayrhofen
Austria
Article
First Time Skiing? The 10 Best Resorts for Beginners
The best European ski resorts for beginners combine gentle terrain, excellent ski schools, and reliable snow so first-timers can build confidence without fighting icy slopes or dodging expert skiers.
Article
How to Choose the Right Ski Resort — A Complete Comparison Guide
With hundreds of European ski resorts competing for your attention, choosing the right one is the decision that shapes your entire trip. Here is a systematic framework for getting it right.
Article
How to Hire Ski Gear in Europe: A Country-by-Country Guide
A practical guide to renting ski equipment across Europe — rental chains, country-by-country pricing, boot fitting tips, and how to save 30-50% by booking online. Covers France, Austria, Switzerland, Italy, and Andorra.
Article
Cheapest Ways to Fly to Ski Resorts: Flight Booking Tips & Best Airports
Stop overpaying for ski trip flights. This guide covers the best airports for every major ski region, budget airlines worth using, and booking strategies that actually save money.